How to sync betaflight/inav configurations

In this tutorial, we'll take a look at how to use FPVSIM's fleet management feature to sync and manage Betaflight/iNav configurations in the browser, no installations required.

After this tutorial, you'll learn:

  • How to sync Betaflight/iNav configs to FPVSIM cloud.
  • How to view the changes of your configs.
  • How to use FPVSIM's CLI interface.

1
Connect to your quad from the Dashboard (login required)
Connect to Betaflight/iNav controller in the browser.

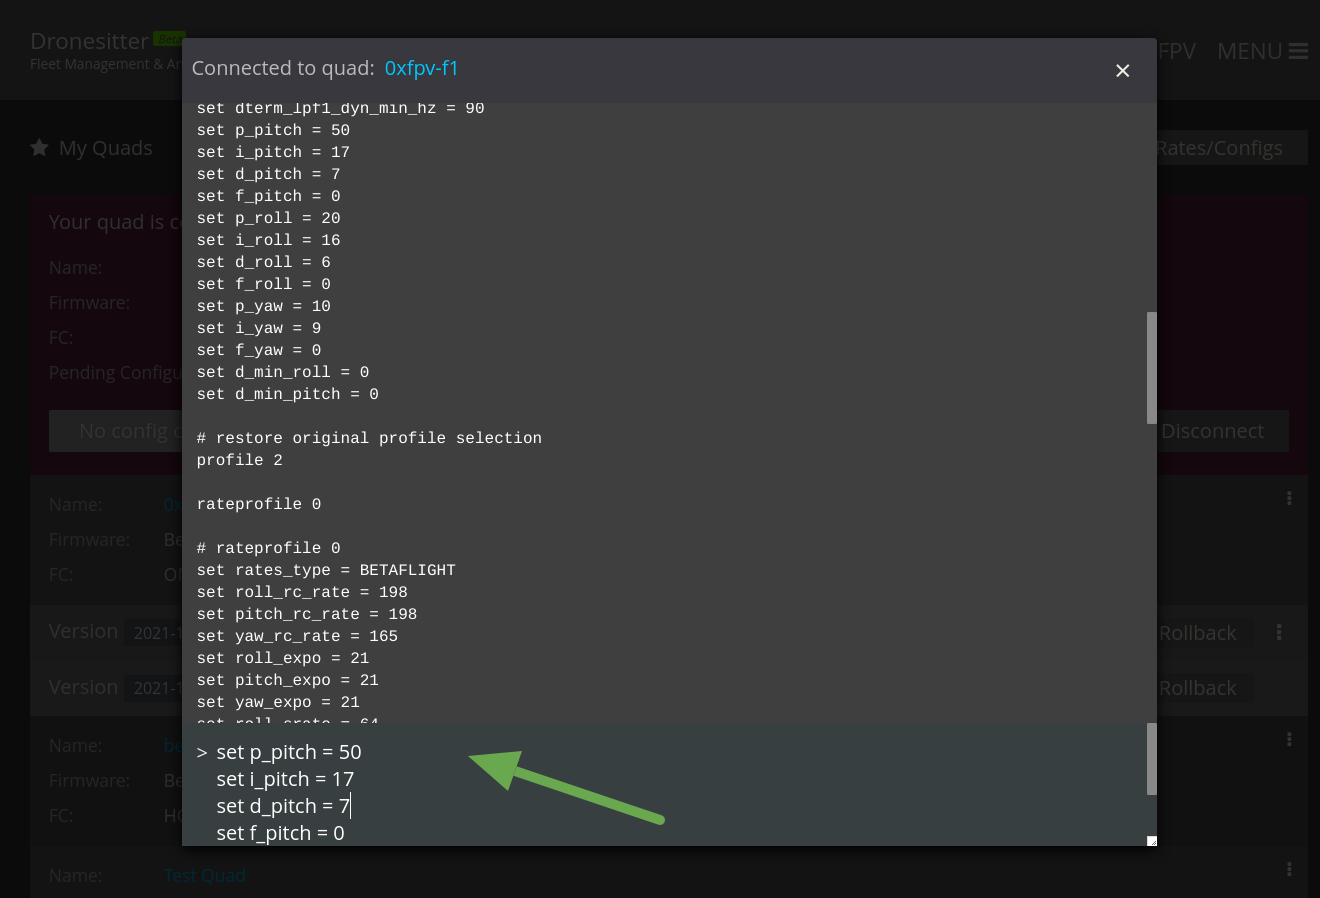
In the dialog popped up, choose the serial port of your quad

Choose Betaflight/iNav serial port.

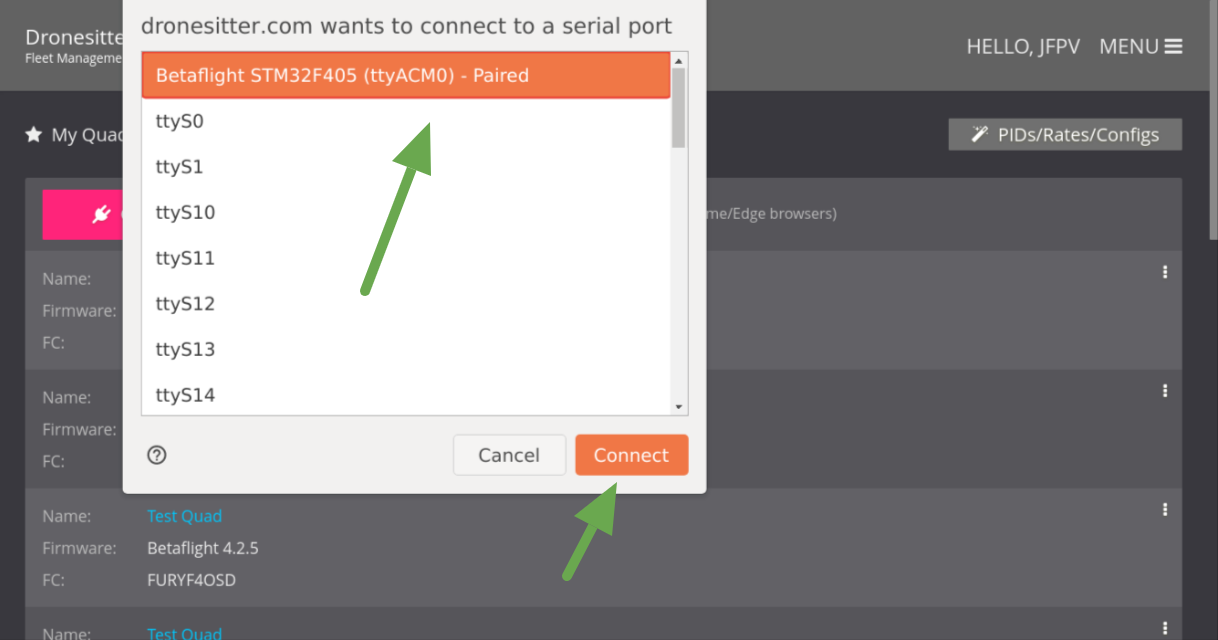
If you don't see a similar dialog, make sure you are using the latest Chrome/Edge browsers. In the future, more browsers will be supported.
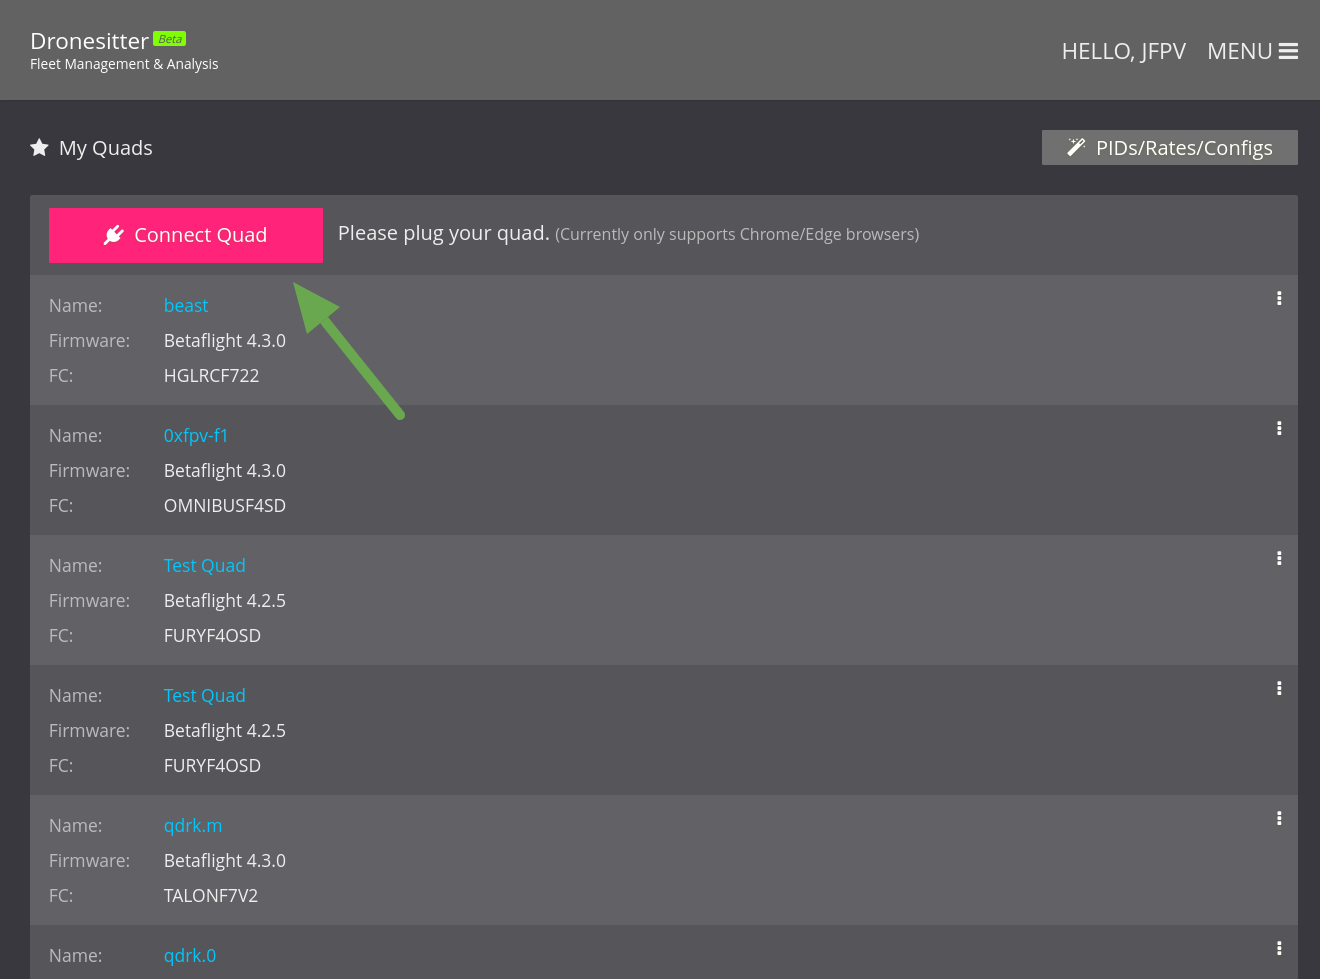
2
After connecting you should see something like this
Connected to Betaflight/iNav serial port.
3
Add your quad to the dashboard by clicking the "+ Add new quad" button
4
After adding the quad, you can view the configs of your quad by clicking on the quad row and the configs row shown below
View Betaflight/iNav configs on FPVSIM.
5
If you made some changes to your quad, the next time you connect your quad to FPVSIM, you'll see the following "Sync config" button, you can click it to sync the new configs to FPVSIM
Sync Betaflight/iNav configs to FPVSIM.
6
You can view the config changes easily like below
View diffs of Betaflight/iNav configs on FPVSIM.
7
You can easily rollback to a previous version
Rollback to a previous Betaflight/iNav config on FPVSIM.
8
FPVSIM also provides a lite weight CLI interface for you to make advanced configuration changes
FPVSIM betaflight/inav CLI interface.

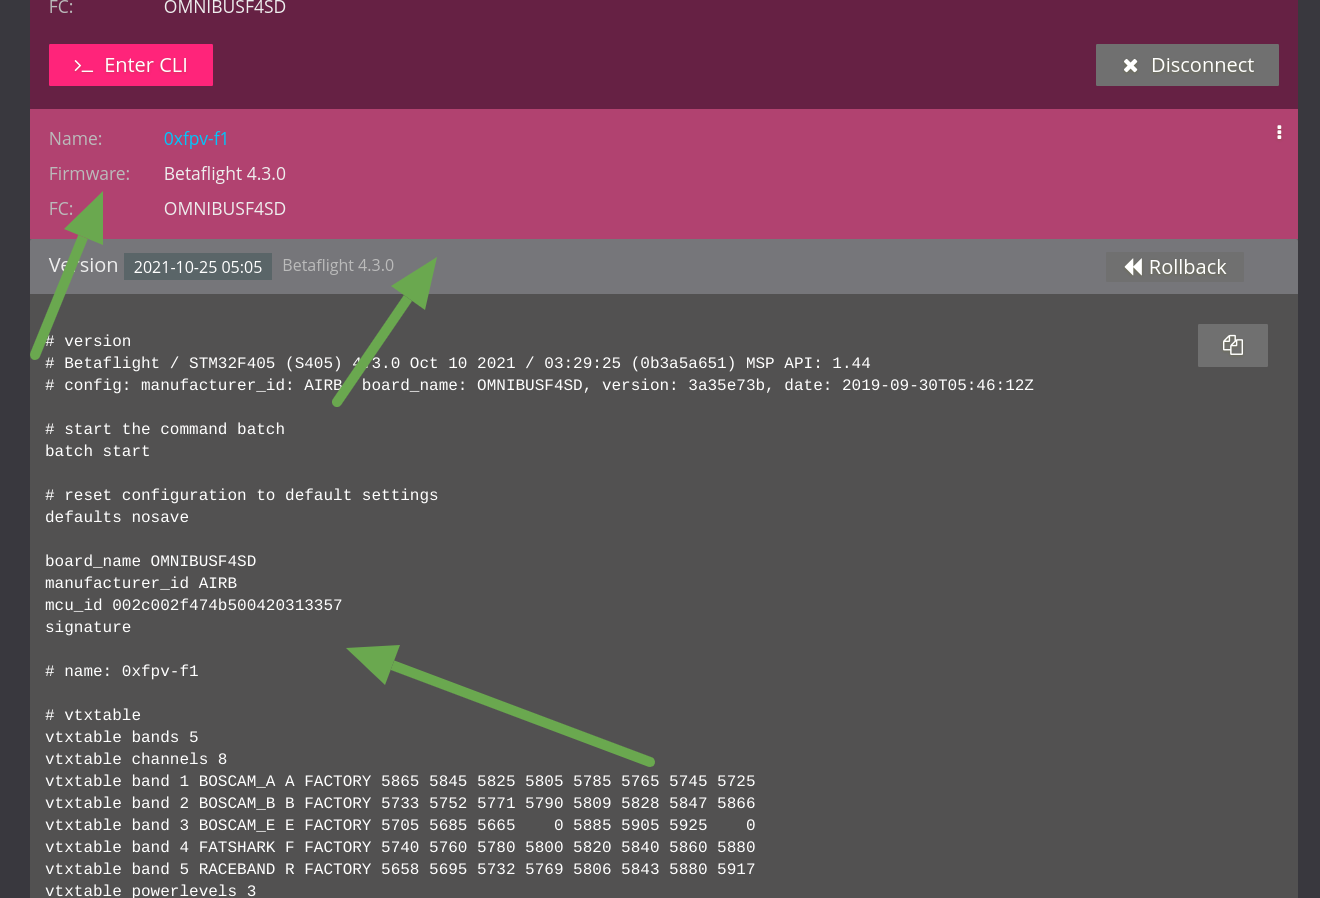
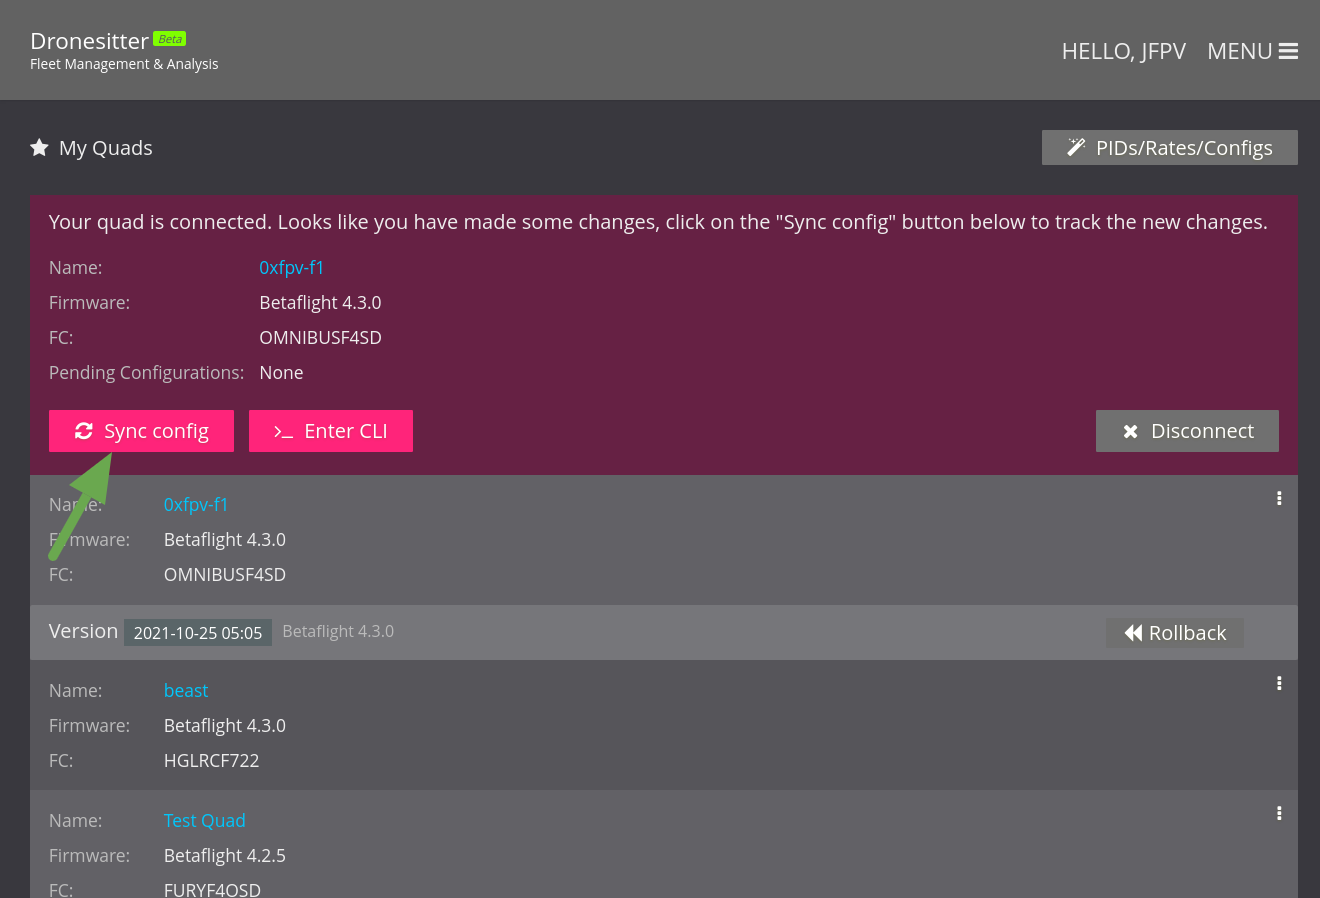
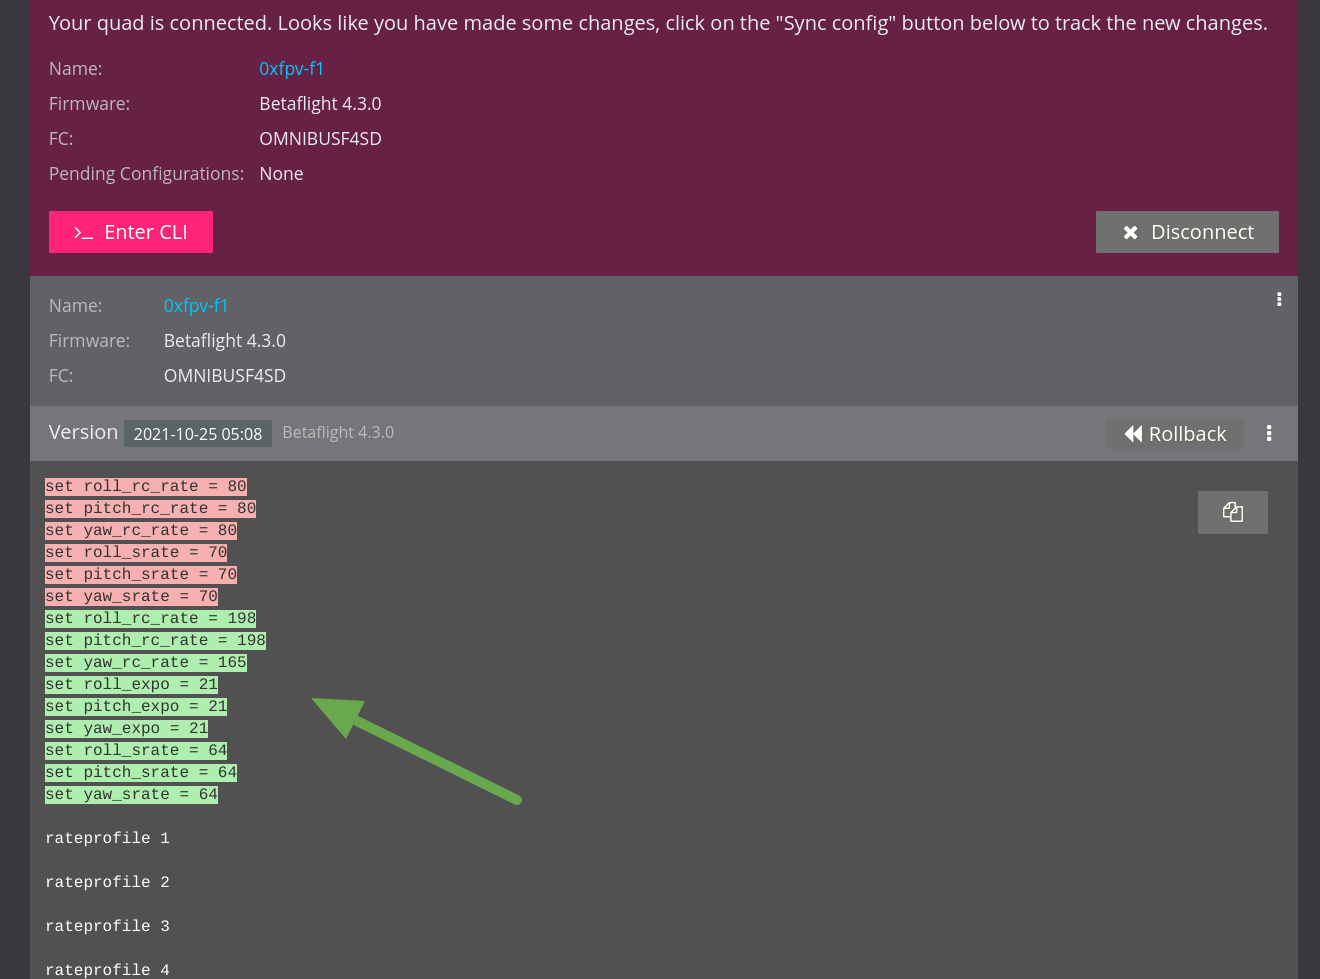
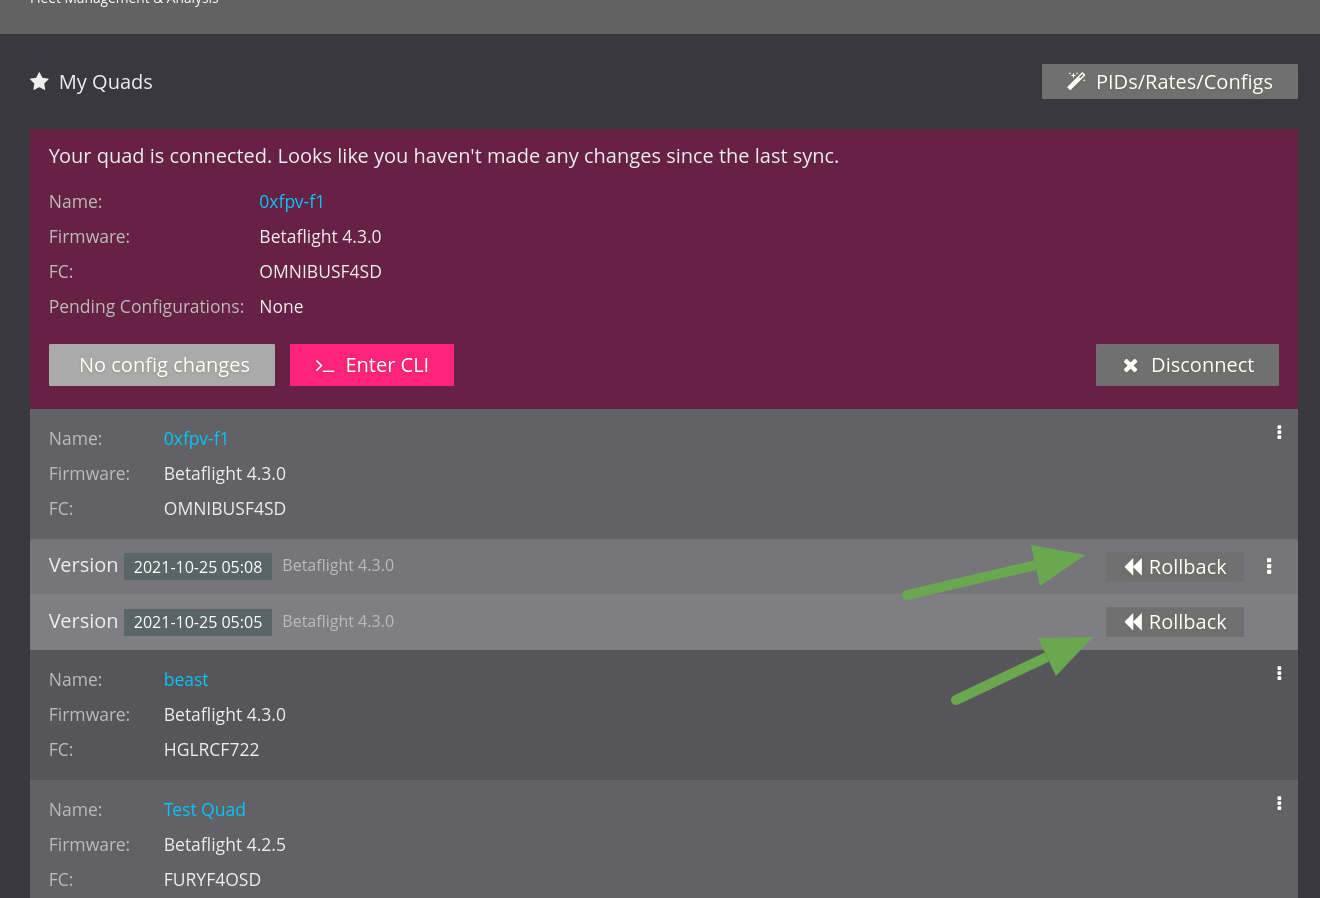
With FPVSIM's fleet management feature, you never had to worry about missing your configs again, and can easily rollback to a previous version with the clarify on what has changed and what has not.